반응형
$ source ~/.bashrc
$ sudo apt-get install ros-noetic-ros-controllers ros-noetic-gazebo* ros-noetic-moveit* ros-noetic-industrial-core
$ sudo apt install ros-noetic-dynamixel-sdk ros-noetic-dynamixel-workbench*
$ sudo apt install ros-noetic-robotis-manipulator
OpenManipulator-X 를 사용하기 위해 종속패키지를 설치 한 후
$ cd ~/catkin_ws/src/
$ git clone -b noetic-devel https://github.com/ROBOTIS-GIT/open_manipulator.git
$ git clone -b noetic-devel https://github.com/ROBOTIS-GIT/open_manipulator_msgs.git
$ git clone -b noetic-devel https://github.com/ROBOTIS-GIT/open_manipulator_simulations.git
$ git clone https://github.com/ROBOTIS-GIT/open_manipulator_dependencies.git
$ cd ~/catkin_ws && catkin_make
openmanipulator 패키지를 설치해준다.
U2D2에 12V 전원을 주고 컴퓨터와 usb로 연결해준다.
$ roslaunch open_manipulator_controller open_manipulator_controller.launchcontroller를 실행하면

위와 같이 다이나믹셀과 연결이 됐다고 나온다. 나는 그리퍼를 연결을 안했어서 l5의 다이나믹셀은 나오지 않았다.
$ roslaunch open_manipulator_teleop open_manipulator_teleop_keyboard.launchManipulator를 키보드로 조정하기 위한 launch를 실행한다.

그럼 위처럼 나온다.
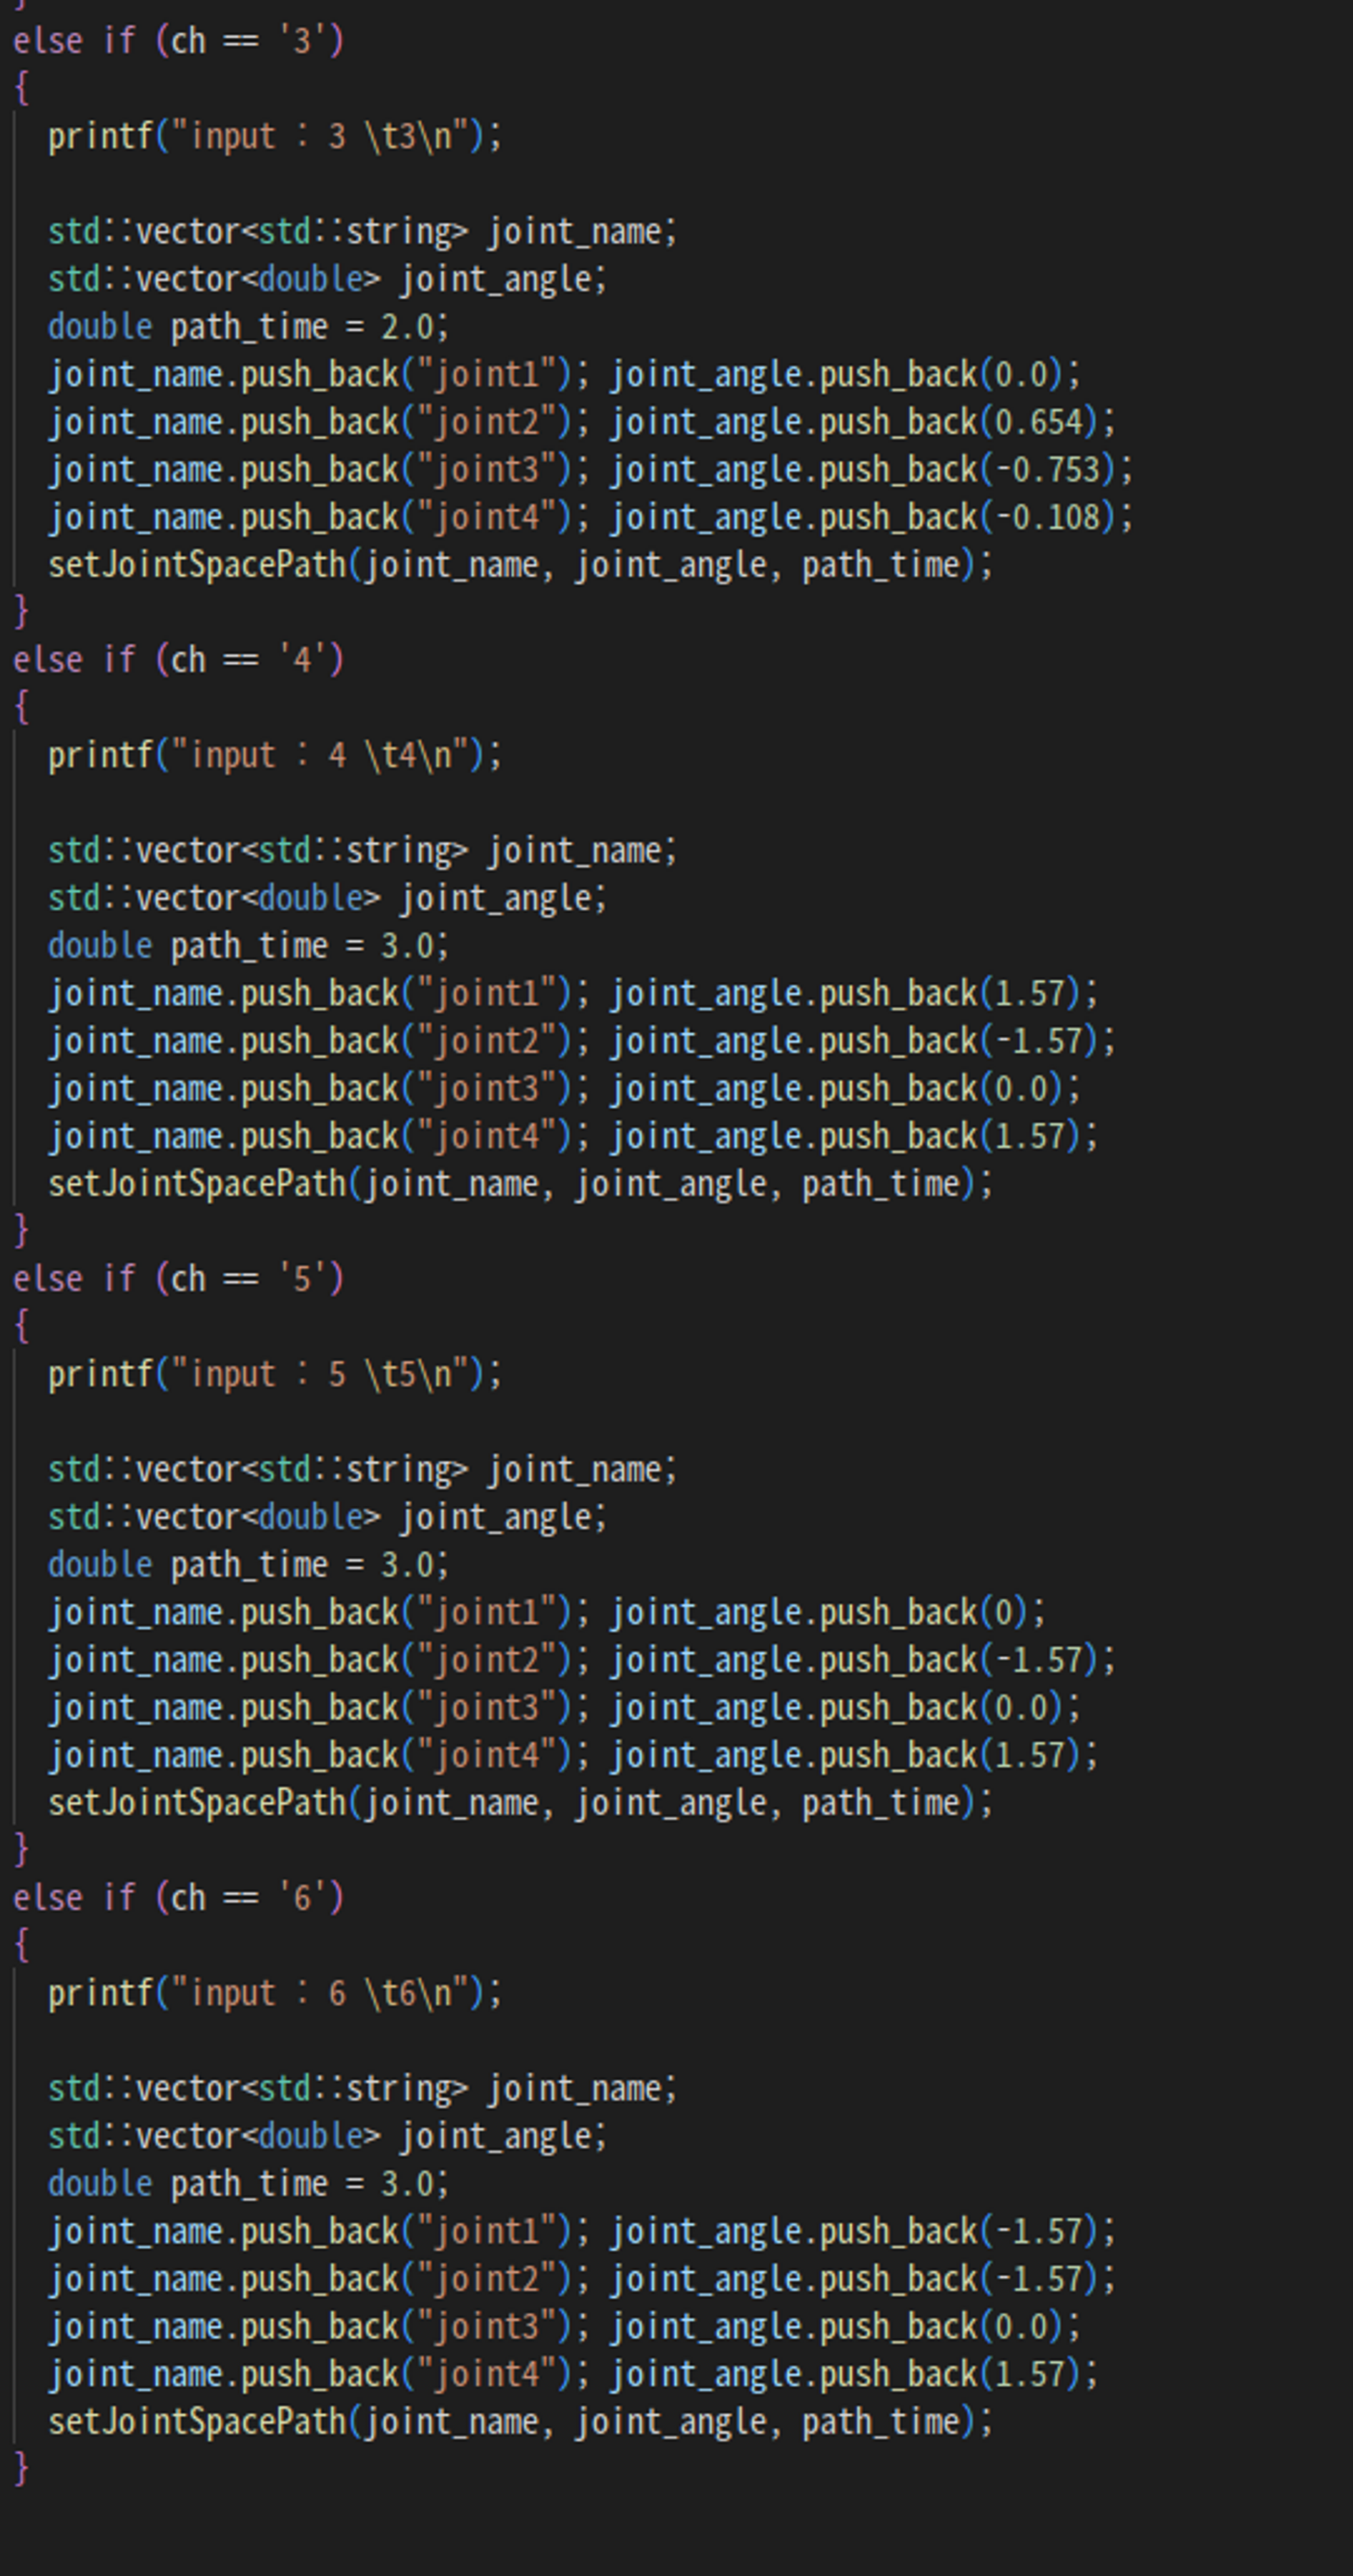
나는
open_manipulator/open_manipulator_teleop/src/open_manipulator_teleop_keyboard.cpp파일에서
3,4,5,6을 새로 추가하여 원하는 위치에 위치하도록 코드를 수정하였다.
$ cd ~/catkin_ws/src/
$ git clone https://github.com/ROBOTIS-GIT/open_manipulator_controls.git
$ git clone https://github.com/ROBOTIS-GIT/open_manipulator_dependencies.git
$ cd ~/catkin_ws && catkin_make
Moveit을 위한 패키지를 다운받는다.
$ roslaunch open_manipulator_controllers joint_trajectory_controller.launch sim:=false위 명령어로 Moveit을 실행시킨다. 여기서 sim:=false가 의마하는 바는
open_manipulator_controls/open_manipulator_controllers/launch/joint_trajectory_controller.launch파일에 들어가보면

sim=true이면 gazebo.launch를 같이 실행시키고, sim=false이면 control.launch를 같이 실행시킨다고 나와있다.
그러므로 Moveit을 실행시킬 때는 control.launch를 따로 실행시키지 않아도 된다. (sim:=false일 때)
반응형
'Ros 공부' 카테고리의 다른 글
| MongoDB install (0) | 2023.03.14 |
|---|---|
| Manipulator_H →Manipulator_P (0) | 2023.03.12 |
| turtlebot3 burger slam & navigation (urdf에 카메라 추가하기) (2) (0) | 2023.03.11 |
| slam-cartographer (0) | 2023.03.11 |
| LDS-02 사용하기 (0) | 2023.03.11 |


